

Welcome to our site, this is our 3rd blog, here in this blog we will discuss about LED Matrix Display controlled by phone through WiFi sending Binary to Decimal Values.
What is Wemos D1 Mini
Read our previous blog.
What is LED Matrix Shield
Read our previous blog.
Please support us on YouTube also. Like Share and Subscribe to our channel : https://youtube.com/c/RatnasRoboLab
Why Phone Control
If user wants to glow a LED or create an animation on LED Matrix Shield without knowing the programming code, the best option is to have a simple interface on phone controlling the 64 leds(BITS).
Binary to Decimal
How to glow a LED or create any animation on 8*8 = 64 bits through phone?
How to send these Binary data to LED Matrix Shield through phone control app?
The best way to send these Binary datas or 64 bits through phone is to send the decimal values of the binary datas.
Algorithm
The Binary numeral system uses 2 number as its base. The two numbers are 0 and 1. This is a positional system; therefore, every digit in a binary number is raised to the powers of 2, starting from the rightmost with 20 , 21 , 22 , 23 and so on.
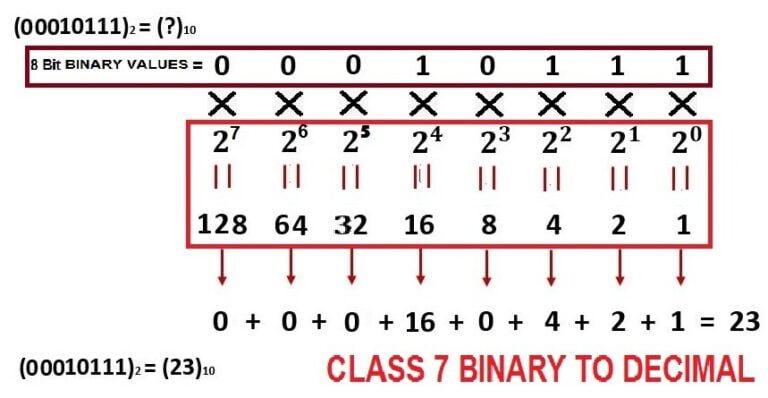
The decimal numeral system is the most commonly used and the standard system in daily life. It uses 10 number as its base. These numbers are from 0 to 9; namely 0, 1, 2, 3, 4, 5, 6, 7, 8 and 9.
Binary values sending from phone to LED Matrix
At first all 64 button’s(named as 01, 02, 03, 04,….,64) binary values are set as 0 and background colour set as light gray. When a user presses any button out of 64 buttons in 8*8 LED Matrix phone control app, that button’s colour changes into red and binary value set as 1, rest of the buttons binary value still remains as 0.
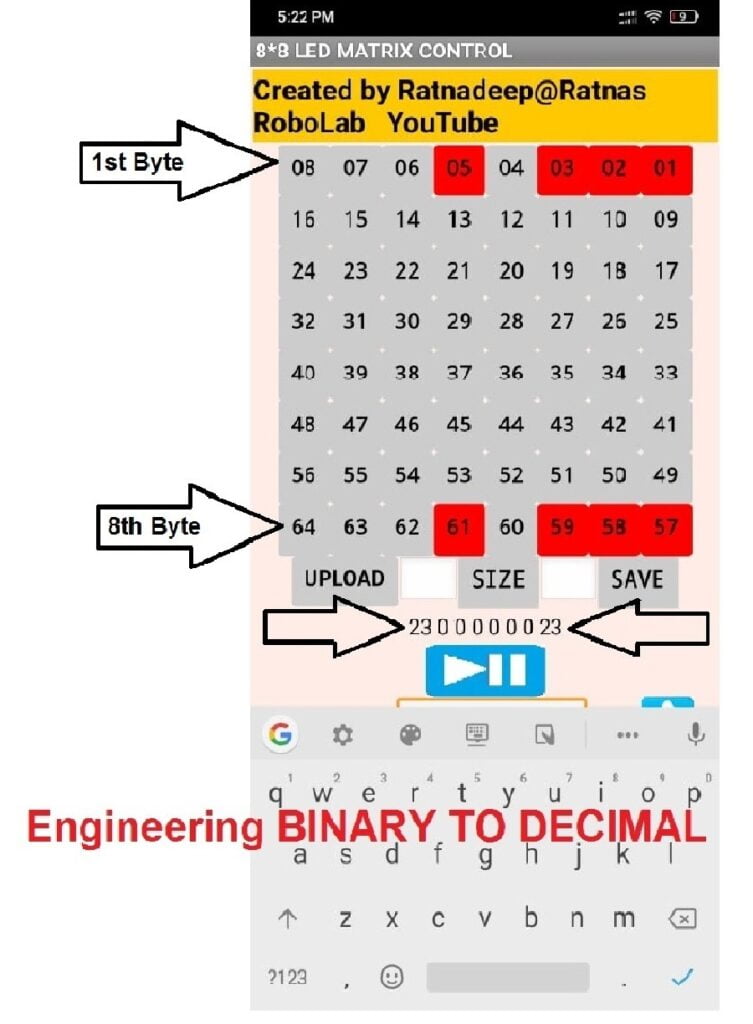

Thus 64 button’s(Bits) binary values are collected and converted into decimal values. Now user can easily send these decimal values to the processor via WiFi, the processor then decodes it into Binary form.
How to make a Phone APP
Learn how to make an app even if you have no coding experience!
You can make any android app very easily without wasting much time by using MIT App Inventor.
What is MIT App Inventor
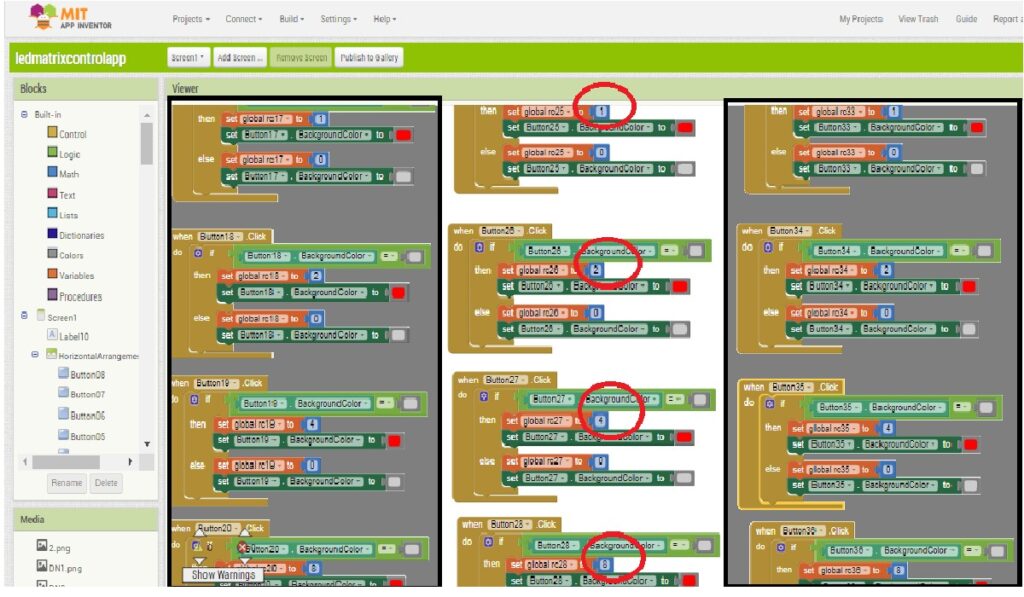
MIT App Inventor is an user friendly and visual programming environment that allows everyone even children to build fully functional apps for smartphones and tablets. Those who are new to MIT App Inventor, can easily make an app in a very less time. Here blocks-based tools are available that helps the creation of complex, high-impact apps efficiently.


Programming Part
Header File
Read our previous blog.
Void Setup ( )
Read our previous blog.
Void Main ( )
Read our previous blog.
Brightness Control
Brightness level is an application that allows you to easily change your LED Matrix display screen’s brightness. As the current through the LED increases, the brightness also increases.


matrix.character( );
matrix.setIntensity( ); //Set Intensity 0-8
In the above images you can see that when the brightness (phone control brightness slider) value is set as 1, LED matrix shield’s brightness is low. When user gradually increases the brightness (phone control brightness slider) value, LED matrix shield’s brightness also intensifies.
Scrolling Control
This project is designed to develop a micro-controller based scrolling message display through phone control for notice board. It can also be used to display any informative content anywhere in railway stations, colleges, shops, supermarkets and other places.
In the above video you can see that how letters are scrolling upward, downward, right and left directions.
Up Scroll
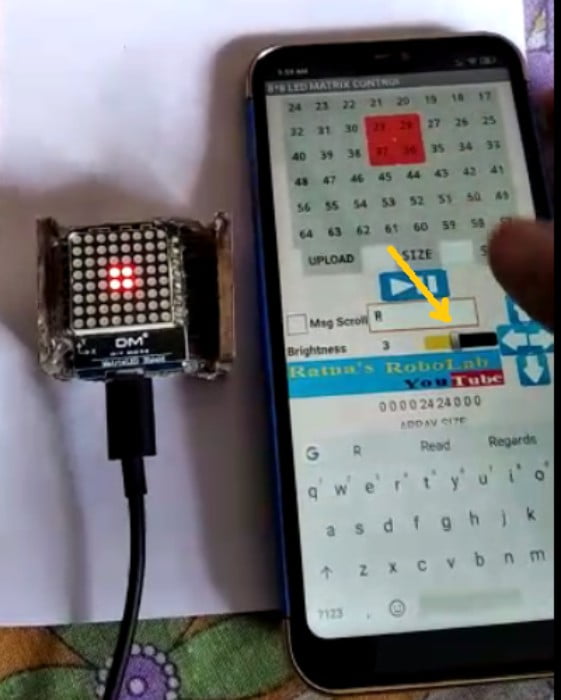
Here in the below images you can see that we want to scroll the letter R. In LED matrix control app, UPWARD button(Upper Arrow Sign) is pressed, button’s colour changes into yellow and also brightness control slider value is set as 4. Thus the letter R scrolls in upward direction via WiFi.


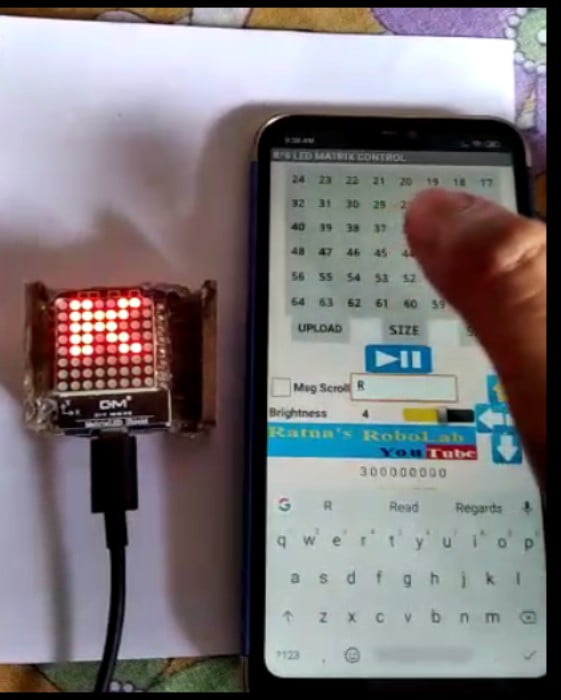
matrix.character( );
matrix.setIntensity(4); //controlled via app(brightness slider)
letterScroll(SCROLL_UP);
Down Scroll
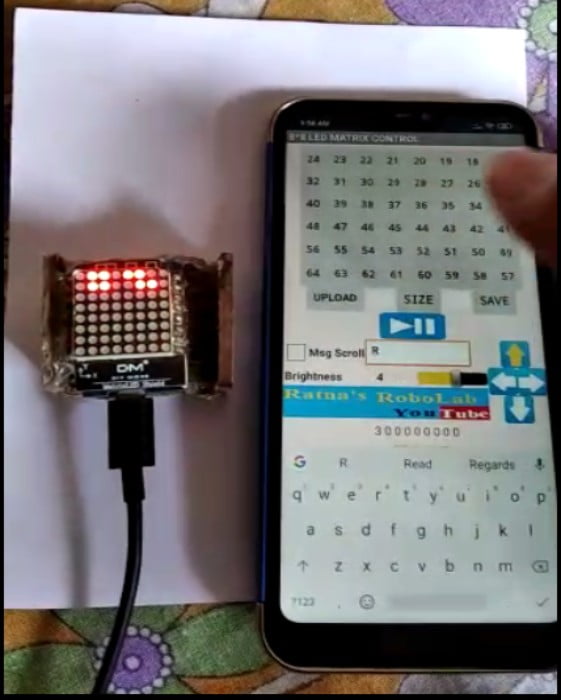
Here in the below images you can see that we want to scroll the letter R. In LED matrix control app, DOWNWARD button(Down Arrow Sign) is pressed, button’s colour changes into yellow and also brightness control slider value is set as 4. Thus the letter R scrolls in downward direction via WiFi.


matrix.character( );
matrix.setIntensity(4);//controlled via app(brightness slider)
letterScroll(SCROLL_DOWN);
Right Scroll
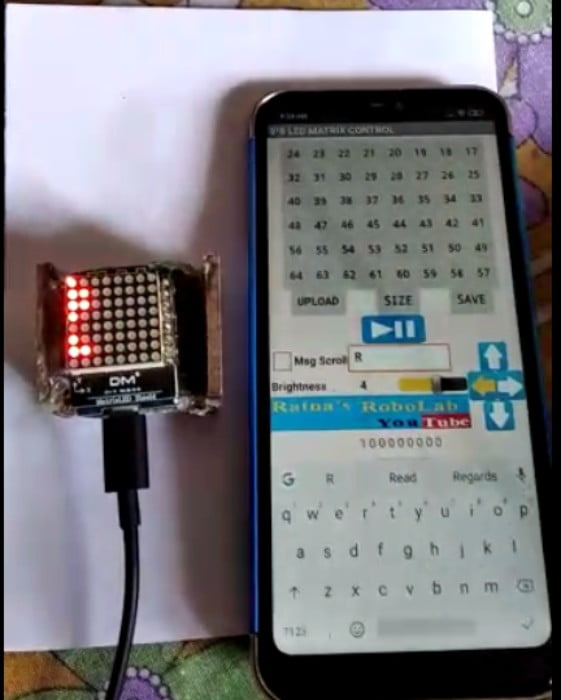
Here in the below images you can see that we want to scroll the letter R. In LED matrix control app, RIGHT button(Right Arrow Sign) is pressed, button’s colour changes into yellow and also brightness control slider value is set as 4. Thus the letter R scrolls in right direction via WiFi.


matrix.character( );
matrix.setIntensity(4);//controlled via app(brightness slider)
letterScroll(SCROLL_RIGHT);
Left Scroll
Here in the below images you can see that we want to scroll the letter R. In LED matrix control app, LEFT button(Left Arrow Sign) is pressed, button’s colour changes into yellow and also brightness control slider value is set as 4. Thus the letter R scrolls in left direction via WiFi.


matrix.character( );
matrix.setIntensity(4);//controlled via app(brightness slider)
letterScroll(SCROLL_LEFT);
Whole Program
//Customized by RatnaDeep
//Support us friends.Like Share and Subscribe our Youtube Channel Ratnas RoboLab

#include <ESP8266WiFi.h>
#include <MLEDScroll.h>
MLEDScroll matrix;
/* Set these to your desired credentials. */
const char *ssid = "RatnaDeep"; // You can change it according to your ease
const char *password = "Welcome"; // You can change it according to your ease
// Create an instance of the server
// specify the port to listen on as an argument
WiFiServer server(80);

void drawChar(byte character[8])    //function of drawchar
{
  for(int y=7;y>=0;y--)
 {
  for (int x=0; x <= 7; x++)
   {
    if (character[(7-y)] & (B10000000 >> x))
    {
     matrix.dot(x,y); // draw dot
    }
    else
    {
     matrix.dot(x,y,0);//clear dot
    }
   }
  matrix.display();
 }
}

void letterScroll(uint8_t _direction)
{
  delay(200);
  uint8_t scrRes;
  do {
    scrRes=matrix.scroll(_direction);
//    if (scrRes==1)
//    matrix.setIntensity(matrix.getIntensity()-1);
  } while (scrRes<=SCROLL_MOVED);
}


void setup()
{
  Serial.begin(115200);
  delay(10);
  matrix.begin();
  matrix.flip=false;
  /* You can remove the password parameter if you want the AP to be open. */
   WiFi.softAP(ssid, password); // --> This line will create a WiFi hotspot.
   IPAddress myIP = WiFi.softAPIP();
  // Start the server
  server.begin();
  // Print the IP address
  Serial.println(WiFi.localIP());
}

void loop()
{
  // Check if a client has connected
  WiFiClient client = server.available();
  if (!client) {
    return;
  }
  // Wait until the client sends some data
  Serial.println("new client");
  while(!client.available()){
    delay(1);
  }
  // Read the first line of the request
  String req = client.readStringUntil('\r');
  Serial.println(req);
  client.flush();
  }
Do you want to support our videos ?
https://www.buymeacoffee.com/ratnasrobolab
Support Our Channel By Shopping parts from Amazon !
Product Links
(1) MAX7219 Dot Matrix MCU LED Display Control Module Kit : https://amzn.to/3V5eboN
(2) Wemos® D1 Mini NodeMcu Lua WIFI ESP8266 Development Board: https://amzn.to/41IWgXw
(3) Programming USB Cable: https://amzn.to/3Nj01yj
(4) MAX7219 Display 4 in 1 : https://amzn.to/3n3DI4Y
Furthur Readings
If you liked this article, then please subscribe to our YouTube Channel. You can also find us on Instagram, Facebook and Twitter.
READ – CONNECT – BOOST – CREATE